
For apparel brands and factories, hot stamping labels need to be both “invisible and seamless” to enhance the wearing experience, and “durable and washable” to prevent peeling and blurring—these two demands directly impact consumer reputation and product repurchase rates. However, in actual production, many companies encounter problems such as “a raised feel after adhesion” and “cracking after a few washes,” wasting costs and lowering product quality. This article, based on industry practical experience, breaks down the core technologies and implementation steps for achieving “seamless adhesion + washability” in hot stamping labels, helping you quickly solve label pain points.
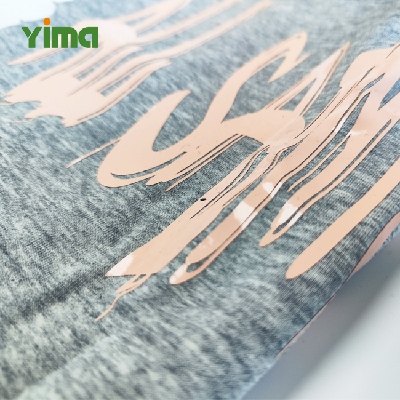
I. First, understand: Why can’t some hot stamping labels achieve “seamless adhesion + washability”?
Many people believe that “choosing expensive heat transfer materials is enough,” but the problems often stem from mismatched technology:
Incorrect Material Selection: Using hard hot melt adhesive with soft fabrics (such as silk or knitted fabrics) can easily create a “hard lump” after bonding, resulting in a foreign body sensation when worn.
Temperature Control Issues: Excessive heat during heat transfer can deform the fabric, while insufficient heat will prevent the adhesive layer from fully melting, leading to weak adhesion and easy peeling after washing.
Omitted Processes: Skipping the “pre-press test” and “cooling and setting” steps results in a weak bond between the adhesive layer and the fabric, or the failure to form a uniform film, significantly reducing washability.
To achieve both a “seamless” feel and “washability,” optimization across the entire chain—from material selection to equipment parameters to process control—is essential; none can be neglected.

II. Three Core Technologies: Achieving “Seamless Adhesion + Water Resistance” for Hot Stamping Labels from the Source
(1) Choosing the Right “Low Melting Point Soft Adhesive Layer”: The Key to a Seamless Application Lies in the Adhesive Layer
The core of a seamless hot stamping label is the adhesive layer—a low melting point, highly elastic hot melt adhesive film must be selected to avoid the foreign body sensation caused by hard adhesive.
Recommended Materials: Prioritize TPU soft adhesive film (good elasticity, low melting point, approximately 100-120℃), or EVA modified adhesive film (suitable for natural fabrics such as cotton and linen). The adhesive layer thickness should be controlled at 0.03-0.05mm (approximately the thickness of an A4 sheet of paper). After adhesion, it will blend seamlessly with the fabric, with no raised areas to the touch.
Avoidance Tips: Do not use PVC hard adhesive film (high melting point, poor elasticity, and prone to hardening after adhesion), especially unsuitable for close-fitting clothing (such as underwear and children’s clothing), as it not only causes a foreign body sensation but may also lead to skin discomfort.
(2) Using “Low Temperature, High Pressure, Short Time” Heat Transfer: The Core of Washability Lies in Adhesion
Heat transfer parameters directly affect the bonding strength between the adhesive layer and the fabric. “Low temperature, high pressure, short time” is the key to balancing “fabric protection” and “adhesion”:
Temperature: Adjust according to the melting point of the adhesive layer. For TPU film, 110-130℃ is recommended; for EVA film, 120-140℃. Avoid excessively high temperatures that could cause the fabric to yellow and the adhesive layer to carbonize (which is prone to cracking).
Pressure: Set to 0.3-0.5MPa (approximately 3-5 kg pressure) to ensure the adhesive layer penetrates evenly into the fabric fibers, forming an “anchoring effect” and improving washability.
Time: 8-15 seconds per heat transfer (shorter time for thin fabrics, slightly longer for thick fabrics) to avoid excessive time causing the adhesive layer to age and become brittle.
(3) Add a two-step process of “pre-pressing + cooling”: Lock in the bonding effect.
Many companies omit “pre-pressing” and “cooling,” resulting in hot stamping labels that “bond firmly at first but fall off after washing”:
Pre-pressing test: Before formal hot stamping, pre-press with scrap fabric to check if the adhesive layer is completely melted and if there are any bubbles (bubbles indicate insufficient pressure or temperature). Adjust the parameters before mass production.
Cooling and setting: Do not immediately peel off the release paper after hot stamping. Allow it to cool naturally for 10-20 seconds (or use cold air for rapid cooling) to allow the adhesive layer and fabric to fully solidify, preventing the adhesive layer from falling off under pressure before it is set.
III. 5-Step Practical Procedure: Even Beginners Can Create “Seamless and Washable” Hot Stamping Labels
Step 1: Select the Base Material for Hot Stamping Labels Based on the Fabric
Soft Fabrics (Silk, Modal): Select “TPU soft adhesive + thin PET release paper” for hot stamping labels. The total thickness of the base material should be ≤0.1mm.
Thick Fabrics (Denim, Canvas): Select “EVA adhesive + thick PET release paper” for hot stamping labels. The adhesive layer can be slightly thicker (0.05-0.06mm) to improve adhesion.
Step 2: Calibrate the Hot Stamping Machine Parameters
Temperature: Use a thermometer to check the actual temperature of the hot stamping head (to avoid discrepancies between the displayed temperature and the actual temperature); Pressure: Test by placing white paper on the fabric. If the white paper shows no obvious indentation after pressing, but the adhesive layer melts, the pressure is appropriate.
Step 3: Positioning and Heat Transfer (Avoid Fabric Seams)
Align the heat transfer label with the designated position on the garment (e.g., inside the collar, side seams), avoiding fabric seams, buttons, and other protruding areas to prevent uneven pressure and poor adhesion.
Step 4: Heat Transfer at “Low Temperature and High Pressure” + Cooling
Start the heat transfer machine and press for 8-15 seconds according to the set parameters. After heat transfer, wait 20 seconds for cooling, then slowly peel off the release paper (if the label falls off during peeling, the temperature or pressure is insufficient and needs to be readjusted).
Step 5: Wash Resistance Test (Required Before Mass Production)
Take 1-2 finished products and conduct a wash resistance test according to national standards (40℃ water temperature, add ordinary laundry detergent, wash 20 times). Check for cracking, peeling, or blurring of the heat transfer label. If the test is passed, proceed with mass production; if it fails, investigate the parameters or material issues.
Summary
Achieving a “seamless fit and washability” for hot-stamped labels is not achieved through a single step, but through a combination of “choosing the right adhesive material + precise parameter control + meticulous process details”. For apparel brands, an “invisible and durable” hot-stamped label can improve the consumer wearing experience and reduce after-sales complaints due to label issues—this is the small detail that differentiates the product and is key to winning over customers. If you are still struggling with material selection or parameter settings, you can directly contact a professional hot-stamped label manufacturer and provide fabric samples for customized solutions, avoiding trial and error costs.
FAQ
This is most likely because the adhesive layer hasn’t penetrated into the knit fabric. You can adjust the following: ① Increase the pressure to 0.4MPa; ② Extend the heat-pressing time by 2-3 seconds to allow the adhesive layer to fully integrate into the fibers.
Choose “food-grade TPU film” (certified by Oeko-Tex® Standard 100), with an adhesive layer thickness ≤0.04mm. After heat-pressing, there should be no raised areas when rubbed by hand. Avoid printing on areas that rub against the skin, such as collars and cuffs.
Choose a hot-stamped label with “high-octane white ink base + colored pattern”. The white ink layer can isolate the dark fabric background color while ensuring the pattern is clear. The white ink layer must also blend with the adhesive layer to avoid adding extra thickness.